Measuring Bags & Cages

When ordering replacement baghouse bag filters, it is extremely important that you order the right size to ensure a proper fit in your baghouse.

Top Load Snap Band Baghouse Filter & Cage Measuring GuideProperly fitting bags and cages are integral to achieving long filter bag life and optimum baghouse performance. Filter bags come in a huge variety of sizes and types, to fit many makes and models of baghouses.

Measuring Filter Bags & Cages - Key Terms

Flat Width/Diameter

This is the most critical measurement, and the one people most often get wrong. As we need this size correct down to a ⅛”, it is not possible to measure the diameter of a loose bag accurately enough for ordering. For that reason, we instead rely on a flat width measurement, which we can then convert to an accurate diameter. 

Overall Length 

For top load pulse jet bags, the bag is the same length as the cage or just 1⁄2” longer. For bottom load pulse jets, where the top of the raw edge bag is folded over the top of the cage, we recommend 4” of overlap, but some OEMs recommend 2”. 

Tubesheet Hole Size/Snap Band Size 

Often the hardest dimension to confirm, a hole size measurement accurate down to 1/32” is required to ensure proper fit. For best results, measure the hole with calipers or check the OEM drawings for details. Alternatively, you can send a sample bag to confirm the tubesheet hole size or have us make a sample bag/cuff to test fit before releasing the entire order to production. 

Size Draft/Accurate Specifications

While it is usually possible to rely on previous bag sizing when reordering, at times, there may be reason to reconfirm all bag and cage sizing choices. Over time, sloppy or copy errors can result in slight variances in sizing making their way into orders and company records. In this way, the original bag sizing can see a slight, but impactful creep over successive orders. 

When we suspect this has happened, we may ask you to go back and provide us with the fundamental component sizing that dictates the overall bag and cage sizing. For top load pulse jet, reverse air, and many shaker units this is the tubesheet hole size. For bottom load pulse jets, and some reverse air/shaker units, it is the mounting hub/venturi. 

Once we have this fundamental sizing information, we can then recommend the proper bag and cage sizing. 

Bag/Cage Fit or “Pinch”

Filters that are too loose or too tight on the cages will severely limit collection efficiency and lead to premature failure. For most felt bag materials (polyester and aramid/nomex being the most common) we generally recommend ¼” to ½” of pinch, meaning the bag diameter is that much larger than the cage. Other specialty fabrics such fiberglass, P84, and fabrics with PTFE membrane applied to them may require tighter tolerances. 

Number Cage Vertical Wires and Horizontal Ring Spacing

Proper care must be taken to ensure that the cage construction will properly support the filter bag as well as optimize cleaning and efficiencies. Most fabrics work well with using cages with 10, 12 or 14 vertical wires. However, some specialty fabrics such fiberglass, P84, and fabrics with PTFE membrane applied to them require the additional support of 20 wire cages and possibly tighter spacing on the horizontal rings.

Common Bag and Cage Size Combos

Below we have listed a few common sizes for pulse jet and reverse pulse systems in use today. 

Top Load Style

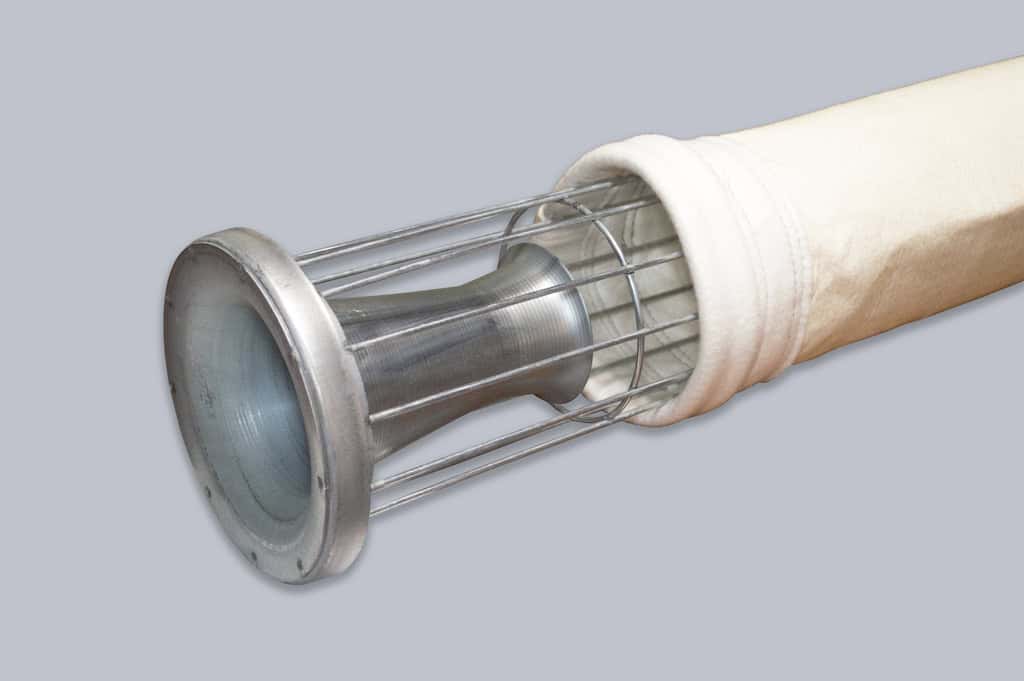
  • —Bag: 6.25” x ¼” tubesheet hole, 5.875” diameter x 96”/120”/144” long, snap band top, disk bottom – Cage: 5.625” diameter x 96”/120/144” long, turned down flange top (with or without integral venturi), pan bottom, 12 vertical wires, horizontal rings on 8” centers
  • —Bag: 6.25” x ¼” tubesheet hole, 6” diameter x 96”/120”/144” long, snap band top, disk bottom – Cage: 5.75” diameter x 96”/120/144” long, turned down flange top (with or without integral venturi), pan bottom, 12 vertical wires, horizontal rings on 8” centers
  • —Bag: 5” x ¼” tubesheet hole, 4.625” diameter x 96”/120”/144” long, snap band top, disk bottom – Cage: 4.5” diameter x 96”/120/144” long, turned down flange top (with or without integral venturi), pan bottom, 12 vertical wires, horizontal rings on 8” centers

Bottom Load Style

  • —Bag: 5.865” diameter x 100”/124” long, raw top, disc bottom – Cage: 5.625” diameter x 96/120”” long, split collar top, pan bottom, 12 vertical wires, horizontal wires on 8” centers (Flex Kleen style bottom load)
  • —Bag: 4.625” diameter x 100”/124” long, raw top, disc bottom –  Cage: 4.5” diameter x 96/120”” long, split collar top, pan bottom, 10 vertical wires, horizontal wires on 8” centers (Mikropul bottom load and “twistlok” style)
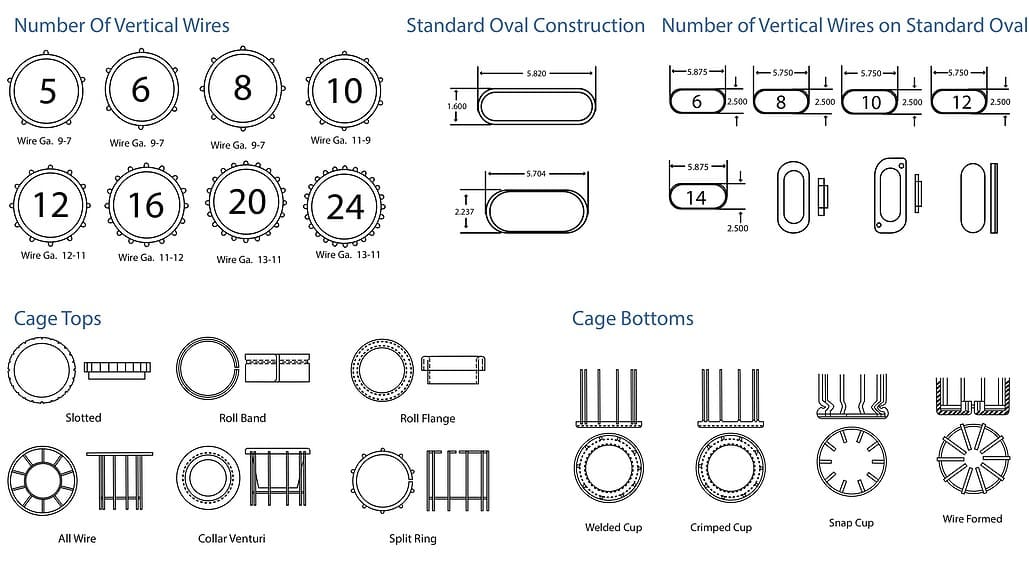
Baghouse Cages - Different Styles Guide


Top Load, Snap Band Filter Bag 

Measuring filter bag

Use a tape measure or ruler and measure the width across the bag.

Flat width/Diameter

  1.  Lay the bag out on a table or floor, flatten it completely.
  2. Use a tape measure or ruler and measure the width across the bag.


Length

Measure along the seam running the length of the bag. Start at the center of the snap band and end at the first stitch at the bottom of the bag.

Cage-to-Bag (Bag-to-Cage) fit

Should have ¼” to 3/8” pinch; the bottom of the bag should have about a thumbs width between the bottom of the cage and the disc bottom of the bag.


Top Load, Snap Band Filter Bag – Woven Fiberglass

  1. Flat width: Flatten bag and measure width across.
  2. Length: Measure along the seam running the length of the bag. Start at the center of the snap band and end at the first stitch at the bottom of the bag.
  3. Cage-to-Bag (Bag-to-Cage) fit:  Should have 1/8” or less pinch, but shouldn’t be stretched tight around the cage.

Top Load, Snap Band Filter Bag – Felt with membrane

  1. Flat width: Flatten bag and measure width across.
  2. Length: Measure along the seam running the length of the bag. Start at the center of the snap band and end at the first stitch at the bottom of the bag.
  3. Cage-to-Bag (Bag-to-Cage) fit:  Should have 1/8” or less pinch, but shouldn’t be stretched tight around cage.

Shaker style Filter Bag

  1. Flat width: Flatten bag and measure width across.
  2. Length: Measure along the seam running the length of the bag. Start at the end of the snap band to the end of the bag, not including the tail.
  3. Length of the tail: Measure along the seam from the end of the bag to the end of the tail
  4. Flat width of the tail: Flatten tail and measure width.
  5. Determine if the tail is 3 ply or 4 ply by pinching the material and feeling for layers.
  6. If there is a wear cuff at the snap band end of the bag, measure length and width.

Measuring Cages - Step-By-Step

Step one: Measure from top to bottom the full length of the cage.

Step one: Measure from top to bottom the full length of the cage.

  1. Full length of the cage:  Measure from top to bottom.
Filter cage measuring

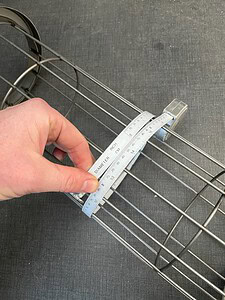
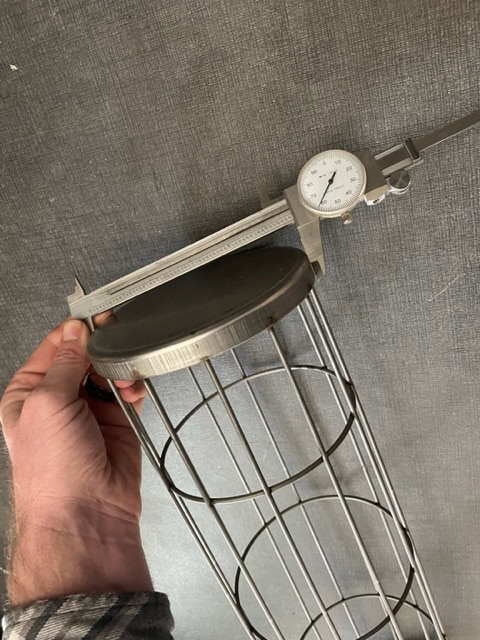
Measure diameter in the middle of the cage at the widest point between wires. Ideally, using a Pi Tape to determine circumference will yield a preferred measurement.

2. Diameter: Measure diameter in the middle of the cage at the widest point between wires. Ideally, using a Pi Tape to determine circumference will yield a preferred measurement.

Be aware that some OEMs make the bottom pan slightly smaller than the cage body to make it easier to insert the cage into the bag. This is why you should always measure the diameter near the middle of the cage.
Filter cage measuring
AVOID measuring the diameter of the cage at the bottom. Measure diameter in the middle of the cage at the widest point between wires.


3. Bottom construction: Determine if the bottom cup is crimped or if the wires are welded to the cup. 

4. Number of rings: Count the number of rings.

5. Space between rings:  Measure the space between the rings. Note: the space between the last ring and the bottom of the cup may be different.

6. Number of vertical wires: Count the number of vertical wires running the length of the cage.

7. Material: Plain steel, galvanized, coated, 304 stainless steel, or specify if it is some other material.

8. Determine the top construction of the cage:

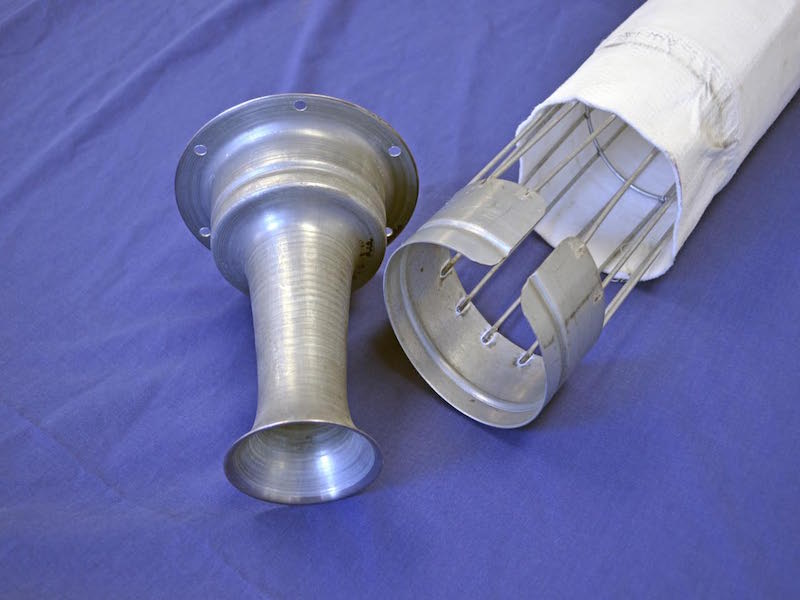
    • — If the top has a venturi, measure the length of the venturi.
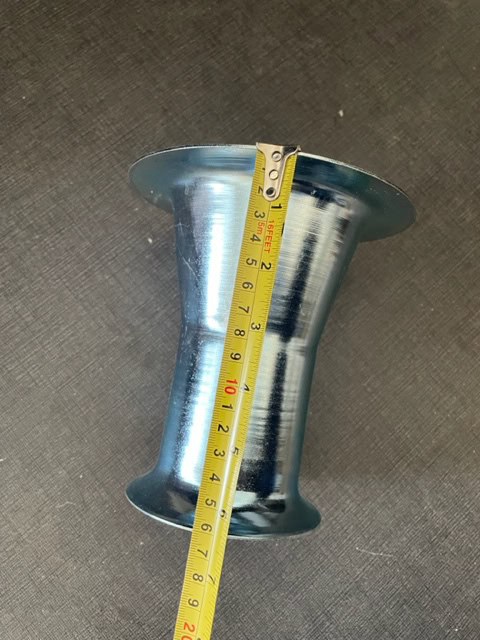
Filter cage venturi measuring
Venturi come in two styles: A separate drop in piece (shown here) or as integral versions that are welded into top of the cage (see photo below)
The Most Common Dust Collector Cage Styles
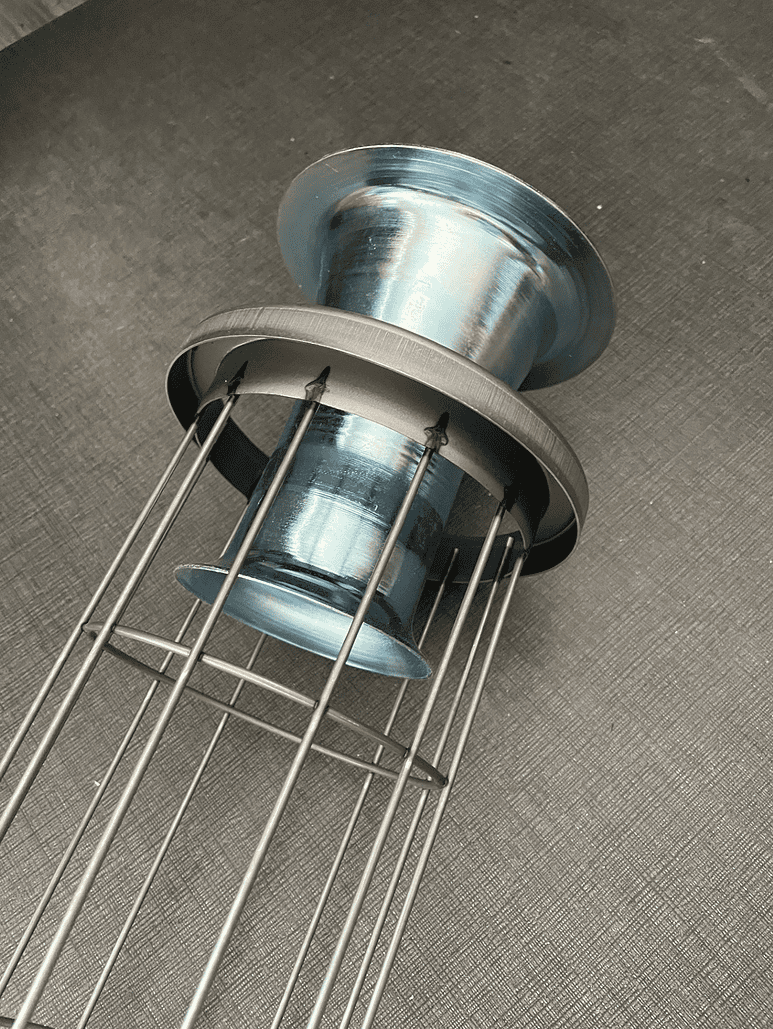
Venturi welded into top of the cage
The Most Common Dust Collector Cage Styles
Some of the most common dust collector cage styles are Split Collar (or Rolled Band) for bottom load units
The Most Common Dust Collector Cage Styles
Other most common dust collector cage styles are Rolled Flange (or Turned Down Flange) and venturi for top load units
    • — If the top has a split top, measure the space between the groove in the split top and the end of the top
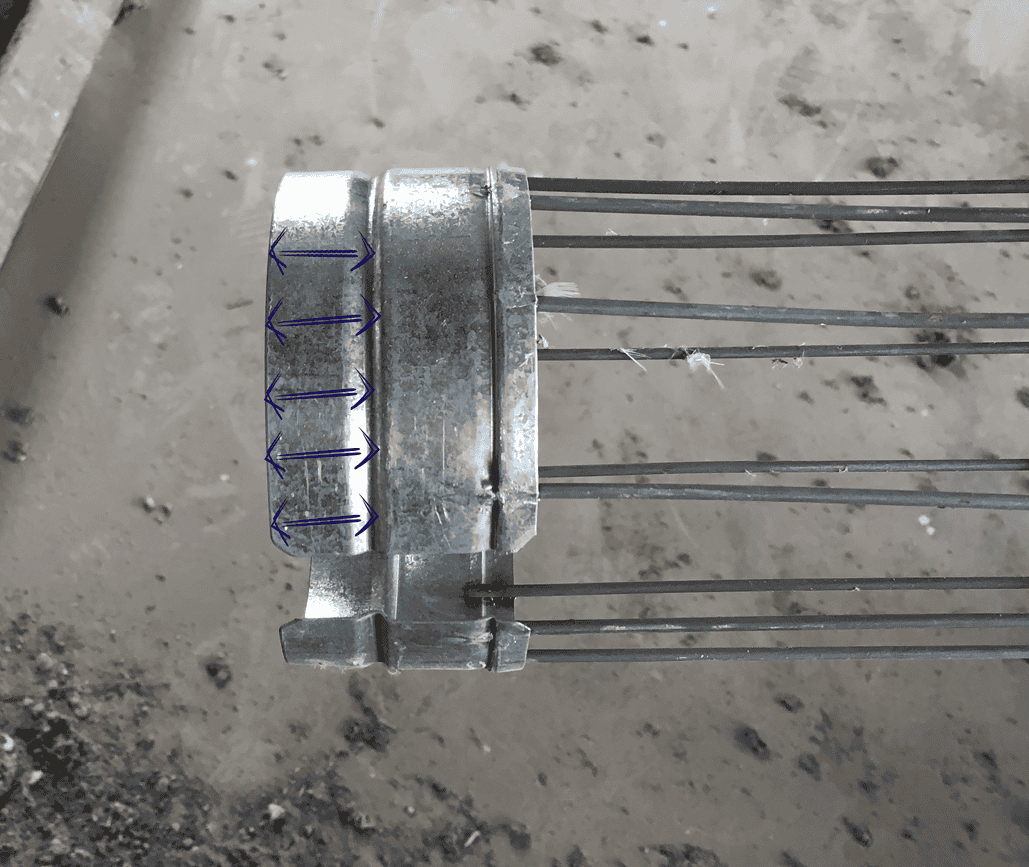
If the top has a split top, measure the space between the groove in the split top and the end of the top
On split top cages, measure the space between the groove in the split top and the end of the top
Tubesheet hole size measuring

Measure across the center of the hole in a straight line from one edge to the opposite edge.

Another important measurement to have in mind when ordering filters or cages, is the size of the tube sheet hole where our filters will be placed. This will ensure there is a perfect seal, extending the life of the filters and not allowing dust to go through.


With a wide range of sizes and types available, it’s essential to select the right filter bags and cages to suit your specific dust collector model. Following these basic steps will help you make informed decisions when ordering replacements, ensuring smooth operation and extended filter bag life for your dust collection system. 

Another option to find out the right size of your filters and cages is to send us a used filter or cage so we can measure it for you. Feel free to get in contact with us if you prefer this option and we will be happy to assist you.


If you need assistance with measuring filters or cages, please reach out to one of our experts clicking below:

Contact Us to Speak to One of Our Baghouse Experts

For more baghouse related training and information, be sure to check out our Baghouse Online Training page.

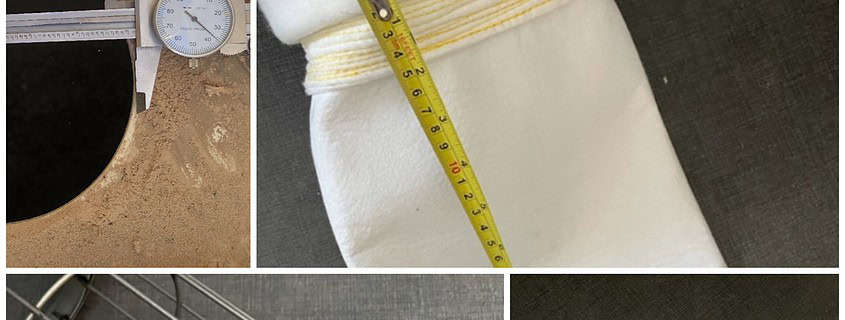
Hole in filter fabric found by

Even the most efficient and well-maintained dust collection systems will occasionally experience leaks, compromising their effectiveness and putting worker health at risk. A mere ⅛” hole in a single filter bag out of 1000+ bags can cause a system to fail a stack test. This is why implementing effective leak detection strategies is crucial. 

A stack test, also known as a performance test or compliance test, measures the emissions from industrial stacks or ducts. While visual checks were common in the past, many facilities now use continuous monitoring systems for more reliable and less labor-intensive measurements. Visual observations still serve as a valuable backup method.

Conducting a dye test is not only for filter bags that have been in operation for an extended period of time. Newly installed ones can (and should) also undergo leak testing. It’s crucial to safeguard your investment in filter bags by performing a dye test on the dust collector after replacing filter bags. 

Leak detection blue light
Conducting a dye test after replacing the bags can prevent leaks due to improperly installed bags or manufacturing defects


How Leak Testing Is Done

  1. Identify an injection port on the negative side of the gas stream closest to the baghouse inlet for injecting the fluorescent dye powder. (Note: Avoid using hopper doors for injection as it disrupts airflow and may leave some filter bag areas uncoated with dye powder.)
  2. Ensure that the baghouse/compartment hopper is free of any accumulated material.
  3. Deactivate the baghouse cleaning mechanism while keeping the exhaust/ID fan operational.
    • —For Pulse Jet Dust Collectors, shut off and lockout the main airline feeding the cleaning system and release all air pressure from the header.
    • —For Mechanical Shaker or Reverse-Air Systems, de-energize and perform a LOTO on the appropriate electrical and pneumatic devices.
Tip: Shutting down the shaking or pulse cleaning mechanism for a short period before inserting the leak testing powder will enhance detection results. This allows the dust cakes to build-up, increasing the pressure between the dirty and clean air sides of the baghouse, encouraging the leak testing powder to find the points of least resistance – the leaks.
Green and Pink Leak Testing Powder
  • 4. Inject an  appropriate amount of fluorescent dye powder into the system based on your baghouse design and application. A general rule of thumb is to use 1 lb of powder for every 1,000 sq/ft of fabric area. For smaller units, a higher ratio is needed.
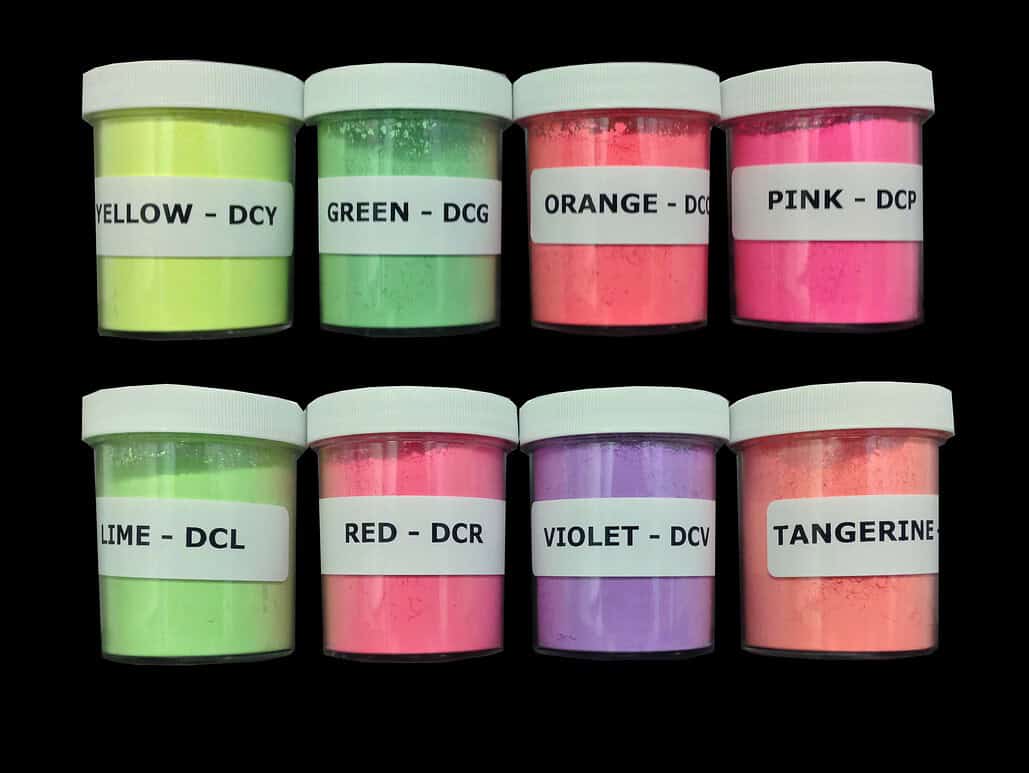
Fluorescent dye powder colors
Leak powder available colors
Different applications require specific fluorescent powder colors for leak identification during the inspection

Leak testing powder can be used in all baghouse types with operating temperatures up to 550°F (288°C). It is important to choose an appropriate color for your specific application, as well as keeping a contrasting color on-hand for repetitive test. The objective is to choose a color that will not blend in with process dust color. 

  • 5. Allow up to five minutes for the leak detection powder to circulate through the system after injection.
  • 6. Shut down the exhaust/ID fan.
  • 7. Before entering the baghouse, ensure compliance with all OSHA/MSHA and site-specific company protocols, including LOTO and Confined Space Entry.
  • 8. Enter the clean air side of the baghouse or compartment being tested. Use a black light and UV filtering glasses to inspect the tubesheet, filter bag, snap band/seating surface, and all other areas on the clean air side of the collector that come into contact with the inlet gas stream. Any leaks will cause the fluorescent dye powder to “glow” under the black UV light, pinpointing the affected area. For optimal results, perform the dye test in darkness with minimal light. (On rare occasions, it may be necessary to also inspect the filters from the dirty side as well to locate hard-to-find leaks.)
  • 9. Document all filter bag failures on a grid sheet and retain them for future reference. Recurring bag failures in the same area may indicate dust collector system design or operational issues.
Bag Replacement Record


Benefits of leak testing for dust collection systems

  • 1. Maintaining Compliance with Environmental Regulations: Governments have stringent air quality standards in place to protect the environment and public health. In many industries, once a leak becomes large enough to create visual emissions at the stack, companies are required to document and report corrective actions and possibly face fines and sanctions. By being proactive with leak testing and promptly repairing any found, an organization can demonstrate its commitment to environmental responsibility, helping them stay within compliance and avoid fines.
Use a contrasting fluorescent dye powder color during retesting to easily identify any previously missed or unidentified failures.
If your maintenance department is conducting the leak test, share the bag filter failures with your baghouse service provider or filter bag manufacturer to assist in identifying the root cause of the problem
  • 2. Protecting Worker Health and Safety: This is most crucial with systems that recirculate the air after it passes through the dust collector. Dust particles generated during industrial processes often contain toxic compounds or otherwise benign materials that are harmful when inhaled. Additionally, leaks on systems handling combustible dusts can lead to accumulations in the ductwork, process equipment, and on elevated surfaces inside the plant (when recirculated), all of which form a severe fire and/or explosion hazard.

Plants that recirculate the air back into the building are often required to install triboelectric bag leak detection systems. These systems are sensitive enough to detect even minute increases in dust emissions. When installed, they can give early warning about leaks as they form, even before they reach reportable levels. For this reason, many plants find triboelectric bag leak detection systems useful even when their use is not strictly mandated by their operating permits or OSHA.

  • 3. Enhancing Equipment Efficiency and Longevity: Leaks in dust collection systems can impact the overall efficiency and performance of many types of process equipment. By proactively identifying and repairing leaks, industries can ensure that their systems operate at optimal efficiency, reducing energy costs, extending equipment lifespan, and minimizing maintenance costs.
  • 4. Preventing Cross-Contamination and Product Loss: In industries where contamination control is critical, leak detection becomes crucial. Leaks in dust collection systems can introduce foreign particles into the production area, compromising the quality and safety of the final product.

If you believe your dust collection system may be suffering from leaks, consider conducting a dye test or contacting professionals like Baghouse.com for assistance. Remember, the benefits of leak testing far outweigh the risks associated with system failures. Protect your workers, your environment and your investment by making leak detection a priority in your maintenance program.


Want to read more about leak testing? Read the article:

Contact Us to Speak to One of Our Baghouse Experts

For more baghouse related training and information, be sure to check out our Baghouse Online Training page.

Industrial America, manufacturing pollution

Dust collection began during the late 1800s Industrial Revolution in the US, spurred by the rise in manufacturing and the oil industry, which generated increased waste like sawdust, coal dust, and chemicals. This waste polluted the air near factories, leading to health concerns. To tackle this, dust collectors were invented.

 
Industrial America, manufacturing pollution
The rise of several manufacturing and oil companies impulsed the need for dust collection systems


The First Dust Collector

The first dust collector is subject to debate, with some attributing it to Wilhelm Beth for his filter-based design, while others credit John Finch for his Cyclone Dust Collector introduced around 1885. Cyclones became popular by 1900 for their effectiveness in collecting coarse dust, and they’re still used today. Operating on centrifugal force, cyclones create a vortex that separates dust from air, depositing it into a collector while letting filtered air out.

 
Dust Collection Inventor
Wilhelm Beth, considered the father of dust collection


The Shaker Dust Collector

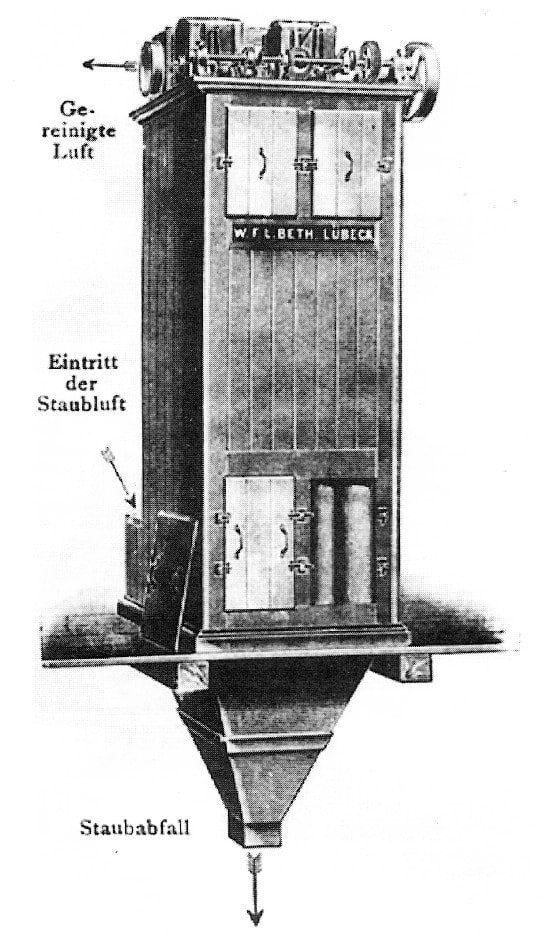
In the mid-1920s, a significant advancement in dust collection emerged with the invention of the Shaker Dust Collector by Wilhelm Beth in Germany. Wilhelm introduced a baghouse unit connected to machines via ductwork to collect sawdust and similar materials. The filter elements in this system are self-cleaned using a vibrating motor attached to the frame, which shakes the filter bags to dislodge accumulated dust.

 
Shaker dust collector design drawing
Shaker dust collector designed by Wilhelm Beth

Over time, the design of the Shaker Dust Collector was refined, incorporating better filters capable of capturing smaller particles while maintaining optimal airflow and efficiency. Although still in use today, Shaker Dust Collectors have declined in popularity due to their relatively low air-to-cloth ratio and large footprint, which demands considerable space.


Cartridge Dust Collector

In the early 1970s, the dust collector saw another evolution with the introduction of the cartridge collector. This innovation replaced the fabric in baghouse filters with cartridge media, offering finer filtration. Capable of efficiently filtering particles as small as 0.3 microns, cartridge collectors excel in removing fumes from the air.


New Dust Collection Options

In the mid-1900’s, environmental regulations became more common and major polluters came under pressure to clean up the massive amounts of dust they generated. Shaker bags and basic fabric filters could not handle the task. 

Reverse air baghouses were invented around this time, shortly followed by pulse jet baghouses. These provided tremendous improvements in dust collection by setting up an arrangement of filtration bags that could be cleaned by fans or compressed air pulses instead of shaking. These methods kept the bags cleaner and increased the efficiency of the filters. 

The invention of baghouses brought a new era in the history of dust collection. Both types of baghouses are still in use today, and they continue to work well. They are especially useful in applications with high temperatures and high humidity. Bags are now made of a wide variety of materials specialized for different needs. 


The Future of Dust Collection

As technology continues to evolve, the future of dust collection holds exciting possibilities. Integration with smart devices and cloud-based platforms could enable remote monitoring and control of dust collection systems, empowering operators to manage their systems with unprecedented efficiency and flexibility. Continued research and development efforts may unveil new methods and technologies to further improve dust collection performance, ultimately fostering safer and healthier work environments across various industries. 


Remote monitoring technology software
Remote monitoring can detect in advance the need for maintenance, or issues that can stop production, like hazardous leaks or fire

With ongoing technological advancements, the future holds the promise of even greater strides in optimizing dust collection systems for enhanced workplace safety and environmental stewardship. Here at Baghouse.com we are always researching and implementing the latest cut edge technologies, continuing to make history in dust collection.


Would you like to know how this technology can be applied to your application?


Contact Us to Speak to One of Our Baghouse Experts

For more baghouse related training and information, be sure to check out our Baghouse Online Training page.