Measuring Bags & Cages

When ordering replacement baghouse bag filters, it is extremely important that you order the right size to ensure a proper fit in your baghouse.

Top Load Snap Band Baghouse Filter & Cage Measuring GuideProperly fitting bags and cages are integral to achieving long filter bag life and optimum baghouse performance. Filter bags come in a huge variety of sizes and types, to fit many makes and models of baghouses.

Measuring Filter Bags & Cages - Key Terms

Flat Width/Diameter

This is the most critical measurement, and the one people most often get wrong. As we need this size correct down to a ⅛”, it is not possible to measure the diameter of a loose bag accurately enough for ordering. For that reason, we instead rely on a flat width measurement, which we can then convert to an accurate diameter. 

Largo 

For top load pulse jet bags, the bag is the same length as the cage or just 1⁄2” longer. For bottom load pulse jets, where the top of the raw edge bag is folded over the top of the cage, we recommend 4” of overlap, but some OEMs recommend 2”. 

Tubesheet Hole Size/Snap Band Size 

Often the hardest dimension to confirm, a hole size measurement accurate down to 1/32” is required to ensure proper fit. For best results, measure the hole with calipers or check the OEM drawings for details. Alternatively, you can send a sample bag to confirm the tubesheet hole size or have us make a sample bag/cuff to test fit before releasing the entire order to production. 

Size Draft/Accurate Specifications

While it is usually possible to rely on previous bag sizing when reordering, at times, there may be reason to reconfirm all bag and cage sizing choices. Over time, sloppy or copy errors can result in slight variances in sizing making their way into orders and company records. In this way, the original bag sizing can see a slight, but impactful creep over successive orders. 

When we suspect this has happened, we may ask you to go back and provide us with the fundamental component sizing that dictates the overall bag and cage sizing. For top load pulse jet, reverse air, and many shaker units this is the tubesheet hole size. For bottom load pulse jets, and some reverse air/shaker units, it is the mounting hub/venturi. 

Once we have this fundamental sizing information, we can then recommend the proper bag and cage sizing. 

Bag/Cage Fit or “Pinch”

Filters that are too loose or too tight on the cages will severely limit collection efficiency and lead to premature failure. For most felt bag materials (polyester and aramid/nomex being the most common) we generally recommend ¼” to ½” of pinch, meaning the bag diameter is that much larger than the cage. Other specialty fabrics such fiberglass, P84, and fabrics with PTFE membrane applied to them may require tighter tolerances. 

Number Cage Vertical Wires and Horizontal Ring Spacing

Proper care must be taken to ensure that the cage construction will properly support the filter bag as well as optimize cleaning and efficiencies. Most fabrics work well with using cages with 10, 12 or 14 vertical wires. However, some specialty fabrics such fiberglass, P84, and fabrics with PTFE membrane applied to them require the additional support of 20 wire cages and possibly tighter spacing on the horizontal rings.

Common Bag and Cage Size Combos

Below we have listed a few common sizes for pulse jet and reverse pulse systems in use today. 

Top Load Style

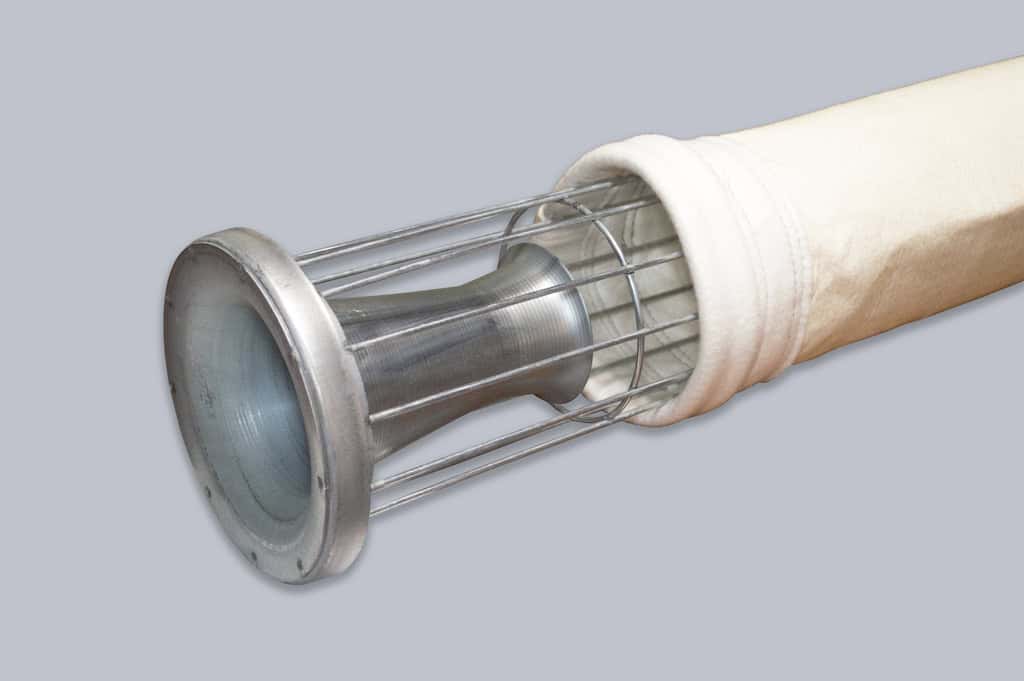
  • —Bag: 6.25” x ¼” tubesheet hole, 5.875” diameter x 96”/120”/144” long, snap band top, disk bottom – Cage: 5.625” diameter x 96”/120/144” long, turned down flange top (with or without integral venturi), pan bottom, 12 vertical wires, horizontal rings on 8” centers
  • —Bag: 6.25” x ¼” tubesheet hole, 6” diameter x 96”/120”/144” long, snap band top, disk bottom – Cage: 5.75” diameter x 96”/120/144” long, turned down flange top (with or without integral venturi), pan bottom, 12 vertical wires, horizontal rings on 8” centers
  • —Bag: 5” x ¼” tubesheet hole, 4.625” diameter x 96”/120”/144” long, snap band top, disk bottom – Cage: 4.5” diameter x 96”/120/144” long, turned down flange top (with or without integral venturi), pan bottom, 12 vertical wires, horizontal rings on 8” centers

Bottom Load Style

  • —Bag: 5.865” diameter x 100”/124” long, raw top, disc bottom – Cage: 5.625” diameter x 96/120”” long, split collar top, pan bottom, 12 vertical wires, horizontal wires on 8” centers (Flex Kleen style bottom load)
  • —Bag: 4.625” diameter x 100”/124” long, raw top, disc bottom –  Cage: 4.5” diameter x 96/120”” long, split collar top, pan bottom, 10 vertical wires, horizontal wires on 8” centers (Mikropul bottom load and “twistlok” style)
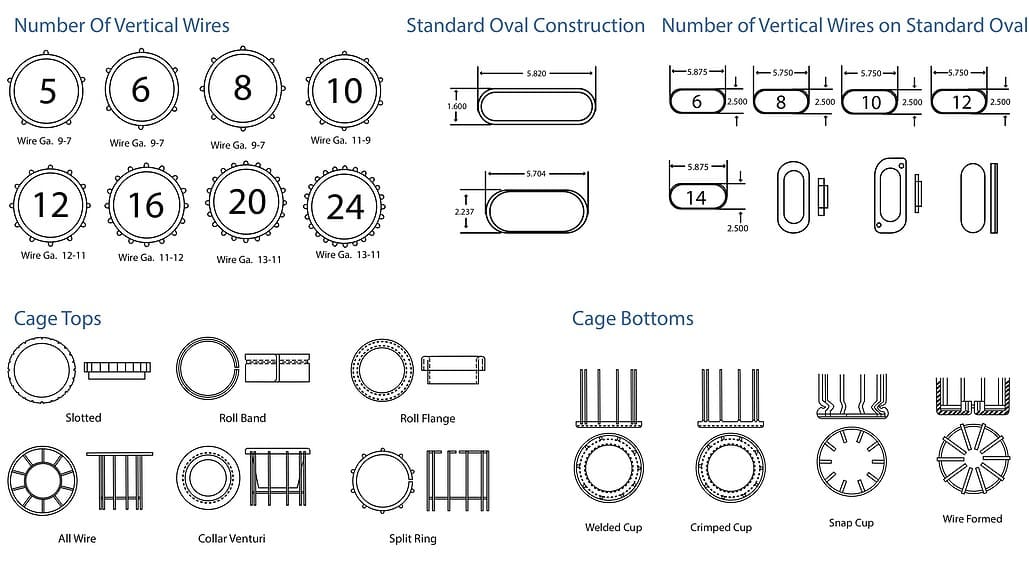
Baghouse Cages - Different Styles Guide
Cantidad de alambres, estilo superior e inferior de las jaulas


Top Load, Snap Band Filter Bag 

Measuring filter bag

Use a tape measure or ruler and measure the width across the bag.

Flat width/Diameter

  1.  Lay the bag out on a table or floor, flatten it completely.
  2. Use a tape measure or ruler and measure the width across the bag.


Longitud

Mide a lo largo de la costura que recorre la longitud de la bolsa. Comienza en el centro de la banda de sujeción y termina en la primera costura en la parte inferior de la bolsa.

Cage-to-Bag (Bag-to-Cage) fit

Should have ¼” to 3/8” pinch; the bottom of the bag should have about a thumbs width between the bottom of the cage and the disc bottom of the bag.


Top Load, Snap Band Filter Bag – Woven Fiberglass

  1. Flat width: Flatten bag and measure width across.
  2. Longitud: Mide a lo largo de la costura que recorre la longitud de la bolsa. Comienza en el centro de la banda de sujeción y termina en la primera costura en la parte inferior de la bolsa.
  3. Cage-to-Bag (Bag-to-Cage) fit:  Should have 1/8” or less pinch, but shouldn’t be stretched tight around the cage.

Top Load, Snap Band Filter Bag – Felt with membrane

  1. Flat width: Flatten bag and measure width across.
  2. Longitud: Mide a lo largo de la costura que recorre la longitud de la bolsa. Comienza en el centro de la banda de sujeción y termina en la primera costura en la parte inferior de la bolsa.
  3. Cage-to-Bag (Bag-to-Cage) fit:  Should have 1/8” or less pinch, but shouldn’t be stretched tight around cage.

Shaker style Filter Bag

  1. Flat width: Flatten bag and measure width across.
  2. Longitud: Measure along the seam running the length of the bag. Start at the end of the snap band to the end of the bag, not including the tail.
  3. Length of the tail: Measure along the seam from the end of the bag to the end of the tail
  4. Flat width of the tail: Flatten tail and measure width.
  5. Determine if the tail is 3 ply or 4 ply by pinching the material and feeling for layers.
  6. If there is a wear cuff at the snap band end of the bag, measure length and width.

Measuring Cages - Step-By-Step

Step one: Measure from top to bottom the full length of the cage.

Step one: Measure from top to bottom the full length of the cage.

  1. Full length of the cage:  Mide de arriba a abajo.
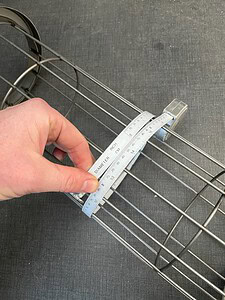
Filter cage measuring

Mide el diámetro en el centro de la jaula, en el punto más ancho entre los cables. Idealmente, usar una cinta Pi para determinar la circunferencia proporcionará una medición exacta.

2. Diámetro: Mide el diámetro en el centro de la jaula, en el punto más ancho entre los cables. Idealmente, usar una cinta Pi para determinar la circunferencia proporcionará una medición exacta.

Be aware that some OEMs make the bottom pan slightly smaller than the cage body to make it easier to insert the cage into the bag. This is why you should always measure the diameter near the middle of the cage.
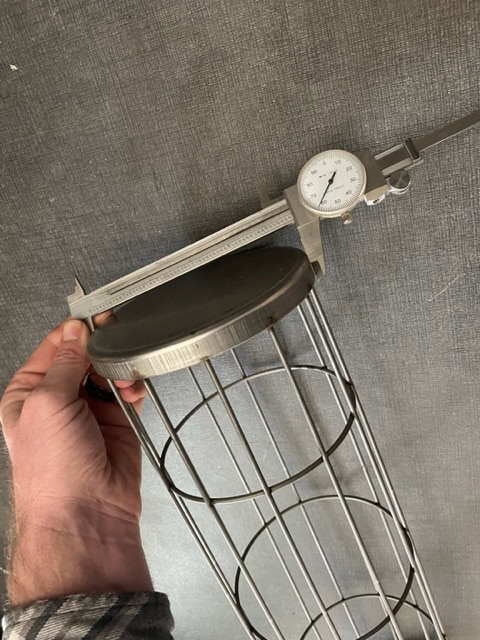
Filter cage measuring
AVOID measuring the diameter of the cage at the bottom. Measure diameter in the middle of the cage at the widest point between wires.


3. Bottom construction: Determina si la copa inferior está doblada o si los cables están soldados a la copa. 

4. Number of rings: Cuenta el número de anillos.

5. Space between rings:  Mide el espacio entre los anillos. Nota: el espacio entre el último anillo y la parte inferior de la copa puede ser diferente.

6. Number of vertical wires: Cuenta el número de alambres verticales que recorren la longitud de la jaula.

7. Material: Acero sin tratar, galvanizado, recubierto, acero inoxidable 304, o especifica si es otro material.

8. Determine the top construction of the cage:

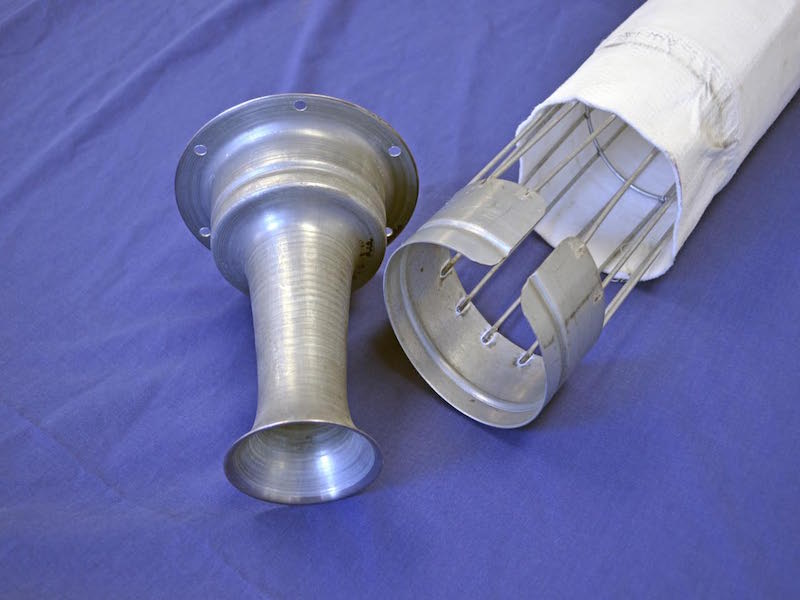
    • — If the top has a venturi, measure the length of the venturi.
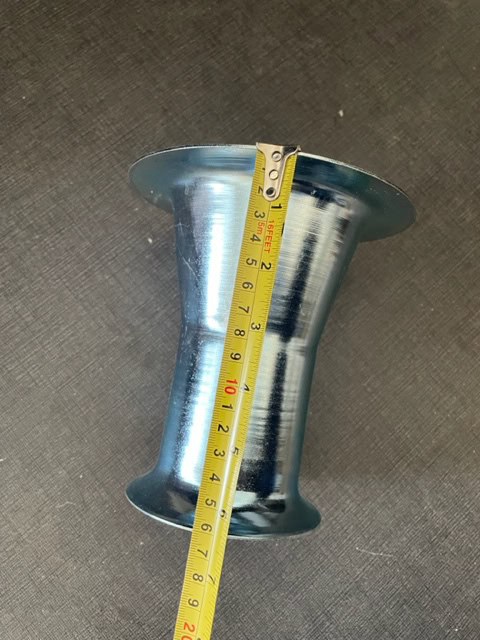
Filter cage venturi measuring
Venturi come in two styles: A separate drop in piece (shown here) or as integral versions that are welded into top of the cage (see photo below)
The Most Common Dust Collector Cage Styles
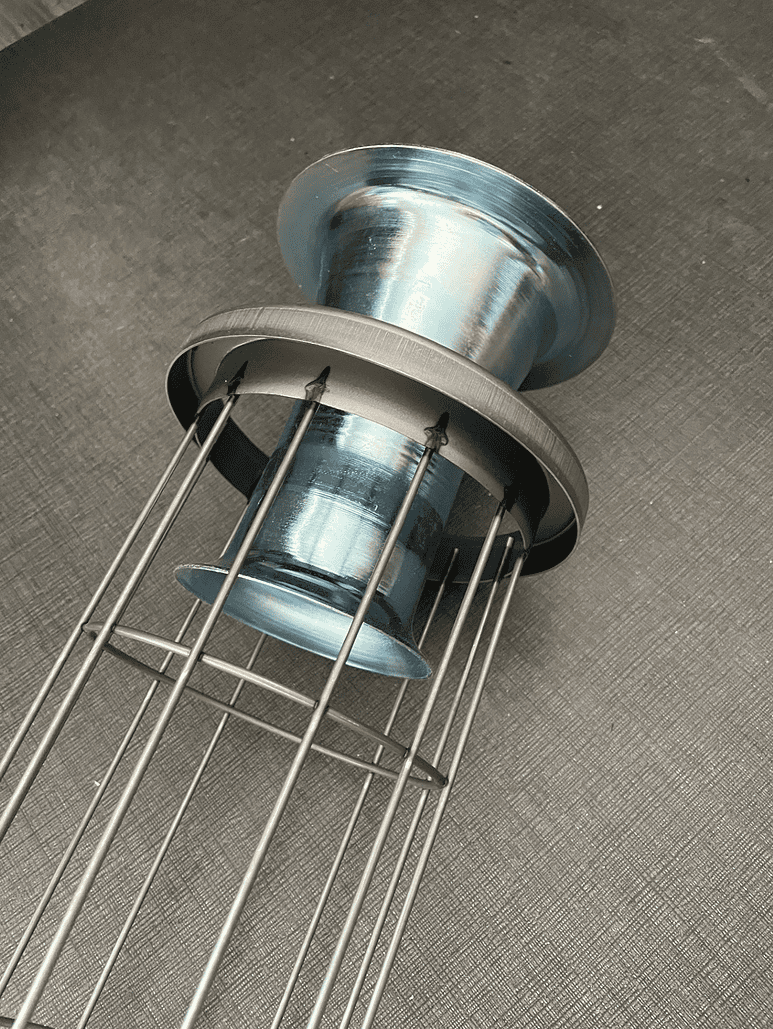
Venturi welded into top of the cage
The Most Common Dust Collector Cage Styles
Some of the most common dust collector cage styles are Split Collar (or Rolled Band) for bottom load units
The Most Common Dust Collector Cage Styles
Other most common dust collector cage styles are Rolled Flange (or Turned Down Flange) and venturi for top load units
    • — If the top has a split top, measure the space between the groove in the split top and the end of the top
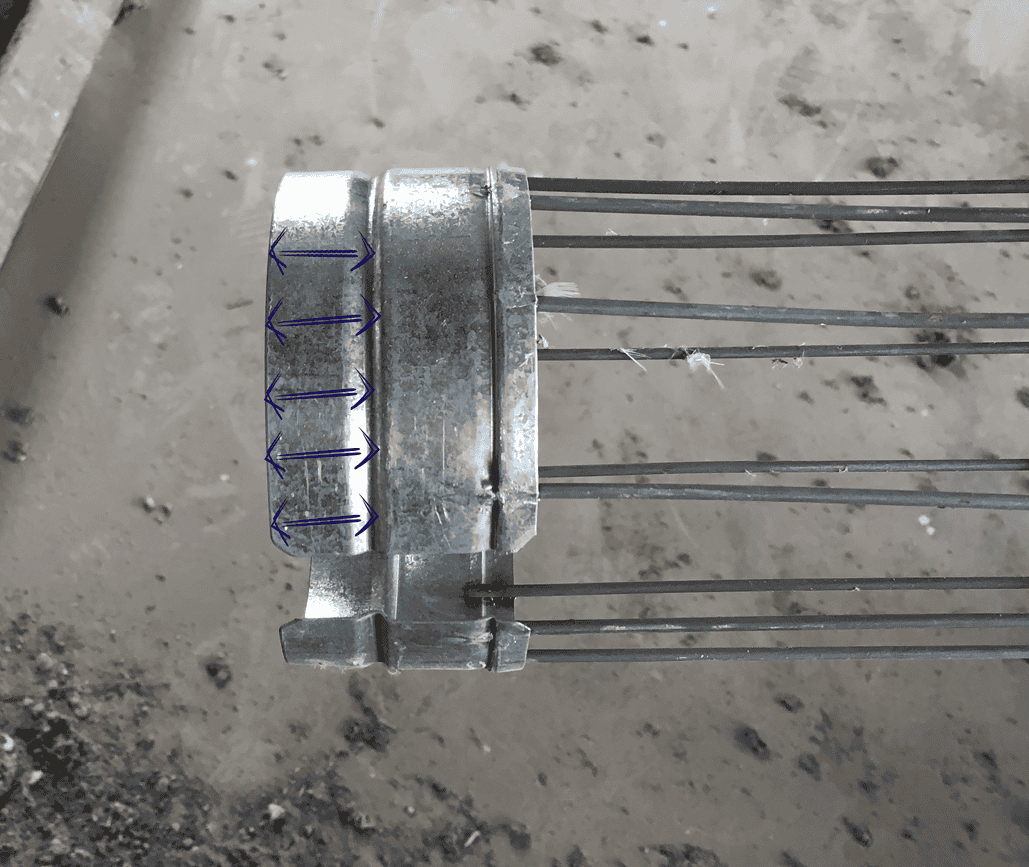
If the top has a split top, measure the space between the groove in the split top and the end of the top
On split top cages, measure the space between the groove in the split top and the end of the top
Tubesheet hole size measuring

Measure across the center of the hole in a straight line from one edge to the opposite edge.

Another important measurement to have in mind when ordering filters or cages, is the size of the tube sheet hole where our filters will be placed. This will ensure there is a perfect seal, extending the life of the filters and not allowing dust to go through.


With a wide range of sizes and types available, it’s essential to select the right filter bags and cages to suit your specific dust collector model. Following these basic steps will help you make informed decisions when ordering replacements, ensuring smooth operation and extended filter bag life for your dust collection system. 

Another option to find out the right size of your filters and cages is to send us a used filter or cage so we can measure it for you. Feel free to get in contact with us if you prefer this option and we will be happy to assist you.


If you need assistance with measuring filters or cages, please reach out to one of our experts clicking below:

Habla con uno de nuestros expertos en recolectores de polvo

Para obtener más capacitación e información relacionada con colectores de polvo, asegúrese de visitar nuestra página de Capacitación sobre Colectores de Polvo haciendo click aquí.

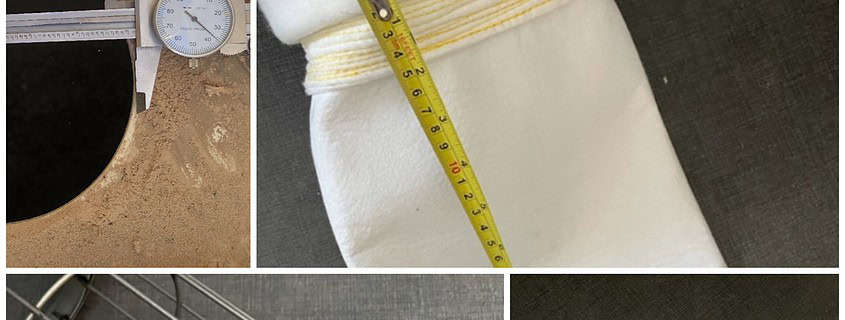
Hole in filter fabric found by

Incluso los sistemas de recolección de polvo más eficientes y mejor mantenidos presentarán fugas ocasionales, lo que compromete su efectividad y pone en riesgo la salud de los trabajadores. Un simple agujero de ⅛” en un solo filtro entre más de 1000 bolsas, puede hacer que un sistema no pase una prueba de emisiones. Por eso es crucial implementar estrategias eficaces de detección de fugas. 

Una prueba de emisiones, también conocida como prueba de rendimiento, mide las emisiones de los conductos o chimeneas industriales. Aunque en el pasado eran comunes las inspecciones visuales, muchas instalaciones ahora utilizan sistemas de monitoreo continuo para obtener mediciones más confiables y menos laboriosas. Las observaciones visuales siguen siendo un método de respaldo valioso.

Realizar una prueba con polvo fluorescente no es solo para los filtros de bolsa que han estado en funcionamiento durante un período prolongado. Los filtros recién instalados también pueden (y deben) pasar una prueba de fugas. Es crucial proteger tu inversión en filtros nuevos realizando una prueba cada vez que uno hace el recambio. 

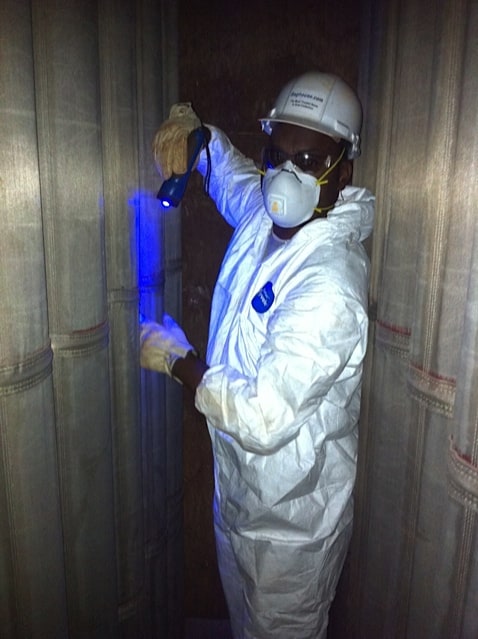
Leak detection blue light
Realizar una prueba con polvo fluorescente después de reemplazar los filtros puede prevenir fugas causadas por una instalación incorrecta o defectos de fabricación


Cómo se realiza la prueba de fugas

  1. Identifique un puerto de inyección en el lado negativo del flujo de gas, lo más cerca posible de la entrada del colector de polvo, para inyectar el polvo fluorescente. (Nota: Evite usar las puertas de la tolva para la inyección, ya que esto interrumpe el flujo de aire y puede dejar algunas áreas de las bolsas filtrantes sin cubrir con el polvo fluorescente).
  2. Asegúrese de que la tolva del colector de polvo o compartimento esté libre de material acumulado.
  3. Desactive el mecanismo de limpieza del colector de polvo, pero mantenga operativo el ventilador de extracción.
    • — Para colectores de pulso de aire comprimido, cierre y bloquee la línea principal de aire que alimenta el sistema de limpieza y libere toda la presión de aire del cabezal.
    • — Para colectores de polvo de sacudida mecánica o de aire inverso, desconecte y realice un bloqueo y etiquetado en los dispositivos eléctricos y neumáticos correspondientes.
Consejo: Apagar la limpieza durante un corto periodo antes de insertar el polvo para la prueba de fugas mejorará los resultados de detección. Esto permite que se forme una capa de polvo, lo que aumenta la presión entre los lados de aire sucio y limpio del sistema, lo que facilita que el polvo fluorescente encuentre los puntos de menor resistencia: las fugas.
Green and Pink Leak Testing Powder
  • 4. Inyecte una cantidad adecuada de polvo fluorescente en el sistema según el diseño y la aplicación de su recolector de polvo. Una regla general es usar 1 libra de polvo por cada 1,000 pies cuadrados de área de tela. Para unidades más pequeñas, se necesita una proporción mayor.
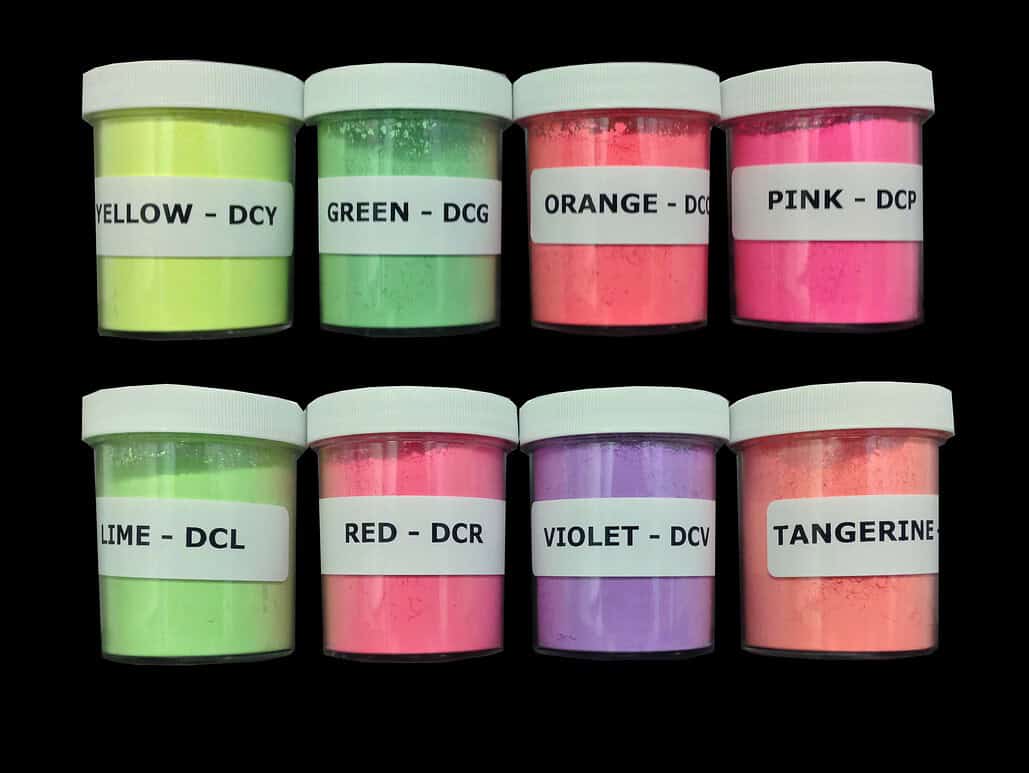
Fluorescent dye powder colors
Leak powder available colors
Diferentes aplicaciones requieren colores específicos de polvo fluorescente para la identificación de fugas durante la inspección

El polvo fluorescente se puede utilizar en todos los tipos de recolectores de polvo con temperaturas de operación de hasta 550°F (288°C). Es importante elegir un color adecuado para su aplicación específica, así como tener a mano un color contrastante para pruebas repetitivas. El objetivo es seleccionar un color que no se mezcle con el color del polvo del proceso. 

  • 5. Deje circular el polvo fluorescente en el sistema durante hasta cinco minutos después de la inyección.
  • 6. Apague el ventilador.
  • 7. Antes de ingresar al recolector de polvo, asegúrese de cumplir con todos los protocolos de OSHA/MSHA y los específicos de la empresa, incluyendo el bloqueo y etiquetado de los controles eléctricos y el protocolo de entrada a espacios confinados.
  • 8. Ingrese al lado de aire limpio del recolector de polvo. Use una luz negra y anteojos con filtro UV para inspeccionar la placa de tubos, lo filtros, la banda de sujeción/superficie de asiento y todas las demás áreas en el lado de aire limpio del colector que estén en contacto con el flujo de gas de entrada. Las fugas harán que el polvo fluorescente "brille" bajo la luz UV negra, señalando el área en donde hay una filtración. Para obtener resultados óptimos, realice la prueba de tinte en oscuridad con luz mínima. (En ocasiones raras, puede ser necesario inspeccionar también los filtros desde el lado sucio para localizar fugas difíciles de encontrar.)
  • 9. Documente todas las fallas de las bolsas de filtro en un informe y consérvelas para futuras referencias. Las fallas recurrentes de filtros en una misma área pueden indicar problemas en el diseño o la operación del sistema.
Bag Replacement Record


¿Cuáles son los beneficios?

  • Cumplir con las Normas Ambientales Los gobiernos imponen estrictos estándares de calidad del aire para proteger el medio ambiente y la salud pública. En muchas industrias, cuando una fuga es lo suficientemente grande como para generar emisiones visibles en la chimenea, las empresas deben documentar y reportar estos eventos, enfrentando posibles multas y sanciones. Al realizar pruebas de fugas de manera proactiva y reparar cualquier problema encontrado, una organización puede demostrar su compromiso con la responsabilidad ambiental, mantenerse en cumplimiento y evitar sanciones.
Use a contrasting fluorescent dye powder color during retesting to easily identify any previously missed or unidentified failures.
Si tu departamento de mantenimiento está realizando la prueba de fugas, comparte las fallas de los filtros de bolsas con el fabricante de las bolsas filtrantes para ayudar a identificar la causa del problema.
  • 2. Proteger la Salud y Seguridad de los Trabajadores Esto es especialmente importantes para sistemas que recirculan el aire después de pasar por el colector de polvo. Las partículas de polvo generadas durante los procesos industriales a menudo contienen compuestos tóxicos o materiales que, aunque inofensivos por sí solos, son perjudiciales al inhalarse. Además, las fugas en sistemas que manejan polvos combustibles pueden provocar acumulaciones en los ductos, equipos y superficies elevadas dentro de la planta, lo que representa un grave peligro de incendio o explosión.

Las plantas que recirculan el aire de vuelta al edificio suelen estar obligadas a instalar sistemas de detección de fugas triboeléctricos. Estos sistemas son lo suficientemente sensibles como para detectar incluso incrementos mínimos en las emisiones de polvo. Una vez instalados, pueden emitir una alerta temprana sobre fugas en formación, incluso antes de que alcancen niveles que deban reportarse. Por esta razón, muchas plantas consideran útiles los sistemas de detección de fugas triboeléctricos, incluso cuando su uso no es estrictamente exigido por las agencias reguladoras del medio ambiente.

  • Mejorando la Eficiencia y la Longevidad del Equipo: Las fugas en los sistemas de recolección de polvo pueden afectar la eficiencia y el rendimiento general de muchos tipos de equipos de proceso. Al identificar y reparar fugas de manera proactiva, las industrias pueden garantizar que sus sistemas operen con una eficiencia óptima, reduciendo los costos de energía, prolongando la vida útil del equipo y minimizando los costos de mantenimiento.
  • Prevenir la Contaminación Cruzada y Pérdida de Producto En industrias donde el control de la contaminación es crítico, la detección de fugas se vuelve esencial. Las fugas pueden introducir partículas extrañas en el área de producción, comprometiendo la calidad y seguridad del producto final.

Si cree que su sistema de recolección de polvo podría tener fugas, considere realizar una prueba con polvo fluorescente o contactar a profesionales de Baghouse.com para obtener asistencia. Recuerde que los beneficios de realizar pruebas de fugas superan con creces los riesgos asociados con fallos en el sistema. Proteja a sus trabajadores, el medio ambiente y su inversión dando prioridad a la detección de fugas en su programa de mantenimiento.


¿Te gustaría aprender más sobre pruebas de fugas? Lee el artículo:

Habla con uno de nuestros expertos en recolectores de polvo

Para obtener más capacitación e información relacionada con colectores de polvo, asegúrese de visitar nuestra página de Capacitación sobre Colectores de Polvo haciendo click aquí.
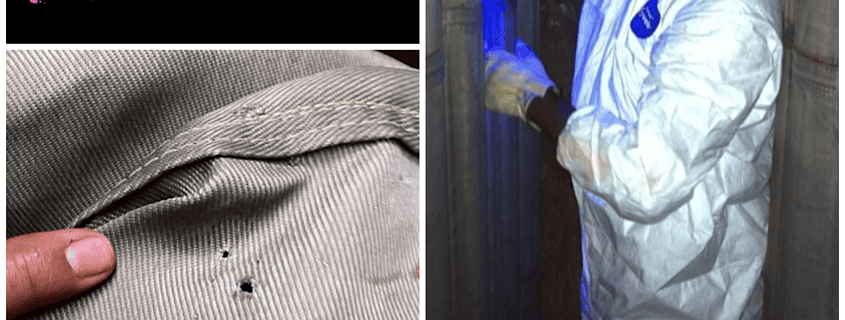
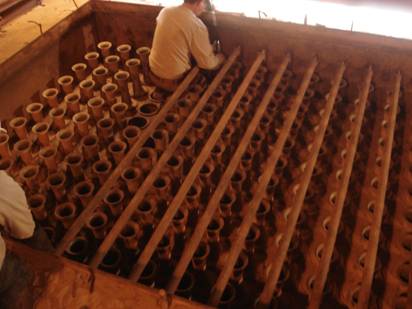
Industrial America, manufacturing pollution

Dust collection began during the late 1800s Industrial Revolution in the US, spurred by the rise in manufacturing and the oil industry, which generated increased waste like sawdust, coal dust, and chemicals. This waste polluted the air near factories, leading to health concerns. To tackle this, dust collectors were invented.

 
Industrial America, manufacturing pollution
The rise of several manufacturing and oil companies impulsed the need for dust collection systems


The First Dust Collector

The first dust collector is subject to debate, with some attributing it to Wilhelm Beth for his filter-based design, while others credit John Finch for his Cyclone Dust Collector introduced around 1885. Cyclones became popular by 1900 for their effectiveness in collecting coarse dust, and they’re still used today. Operating on centrifugal force, cyclones create a vortex that separates dust from air, depositing it into a collector while letting filtered air out.

 
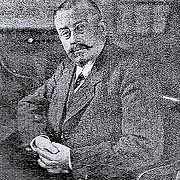
Dust Collection Inventor
Wilhelm Beth, considered the father of dust collection


The Shaker Dust Collector

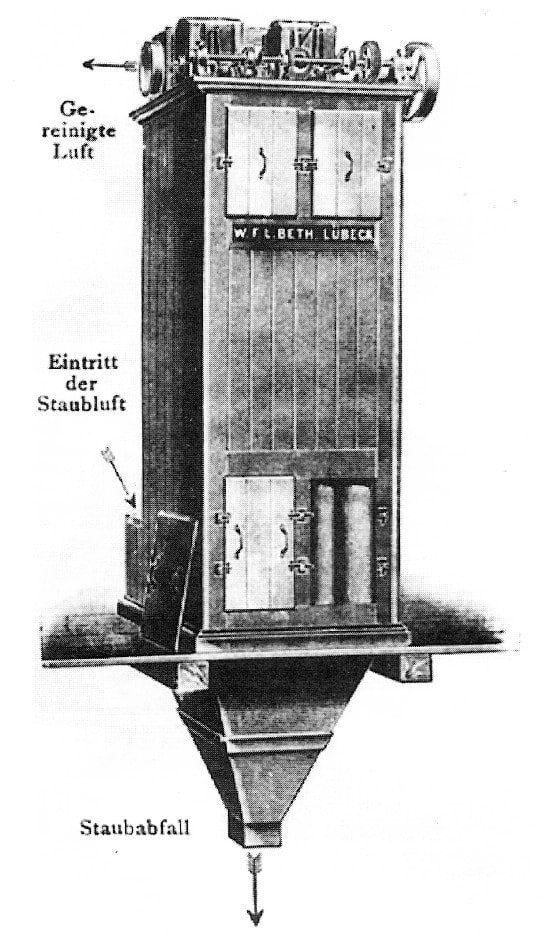
In the mid-1920s, a significant advancement in dust collection emerged with the invention of the Shaker Dust Collector by Wilhelm Beth in Germany. Wilhelm introduced a baghouse unit connected to machines via ductwork to collect sawdust and similar materials. The filter elements in this system are self-cleaned using a vibrating motor attached to the frame, which shakes the filter bags to dislodge accumulated dust.

 
Shaker dust collector design drawing
Shaker dust collector designed by Wilhelm Beth

Over time, the design of the Shaker Dust Collector was refined, incorporating better filters capable of capturing smaller particles while maintaining optimal airflow and efficiency. Although still in use today, Shaker Dust Collectors have declined in popularity due to their relatively low air-to-cloth ratio and large footprint, which demands considerable space.


Cartridge Dust Collector

In the early 1970s, the dust collector saw another evolution with the introduction of the cartridge collector. This innovation replaced the fabric in baghouse filters with cartridge media, offering finer filtration. Capable of efficiently filtering particles as small as 0.3 microns, cartridge collectors excel in removing fumes from the air.


New Dust Collection Options

In the mid-1900’s, environmental regulations became more common and major polluters came under pressure to clean up the massive amounts of dust they generated. Shaker bags and basic fabric filters could not handle the task. 

Reverse air baghouses were invented around this time, shortly followed by pulse jet baghouses. These provided tremendous improvements in dust collection by setting up an arrangement of filtration bags that could be cleaned by fans or compressed air pulses instead of shaking. These methods kept the bags cleaner and increased the efficiency of the filters. 

The invention of baghouses brought a new era in the history of dust collection. Both types of baghouses are still in use today, and they continue to work well. They are especially useful in applications with high temperatures and high humidity. Bags are now made of a wide variety of materials specialized for different needs. 


The Future of Dust Collection

As technology continues to evolve, the future of dust collection holds exciting possibilities. Integration with smart devices and cloud-based platforms could enable remote monitoring and control of dust collection systems, empowering operators to manage their systems with unprecedented efficiency and flexibility. Continued research and development efforts may unveil new methods and technologies to further improve dust collection performance, ultimately fostering safer and healthier work environments across various industries. 


Remote monitoring technology software
Remote monitoring can detect in advance the need for maintenance, or issues that can stop production, like hazardous leaks or fire

With ongoing technological advancements, the future holds the promise of even greater strides in optimizing dust collection systems for enhanced workplace safety and environmental stewardship. En Baghouse.com we are always researching and implementing the latest cut edge technologies, continuing to make history in dust collection.


Would you like to know how this technology can be applied to your application?


Contact Us to Speak to One of Our Baghouse Experts

Para obtener más capacitación e información relacionada con colectores de polvo, asegúrese de visitar nuestra página de Baghouse Online Training page.